SERA integration on Akamai
Kindly follow the below steps to setup the routing of bot traffic to SERA.
Steps
-
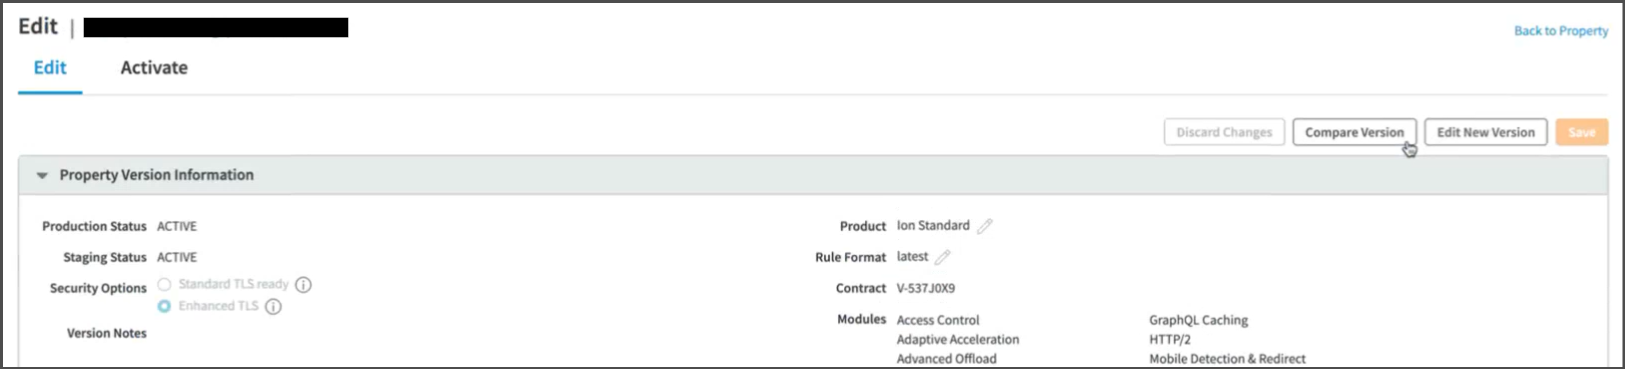
Open Akamai Dashboard, and Create new Configuration Version
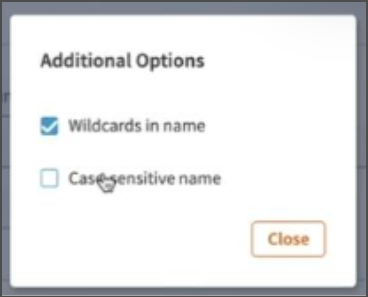
From now onwards, while creating any condition, uncheck the
Case-sensitive namecheckbox from theAdditional Optionsmenu.
-
Creating Property configuration rule
-
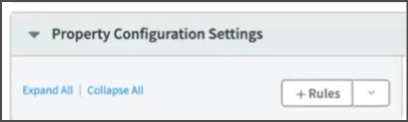
Create new rule in Property Configuration Settings
-
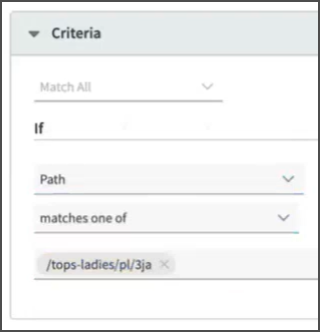
Add following conditions :
-
Path: Put condition to match respective page url pattern that will be sent to SERA
-
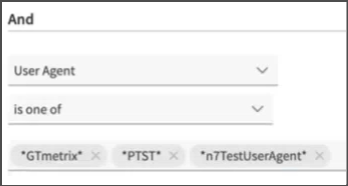
User-Agent: Putis-one-ofcondition for following user-agents-
During POC phase, add these agents :
*n7TestUserAgent**PTST**GTmetrix*
-
For going live with SERA, add these agents :
*n7TestUserAgent**PTST**GTmetrix**googlebot**google\ page\ speed**chrome-lighthouse**google-inspectiontool**PTST**GTmetrix*
-
-
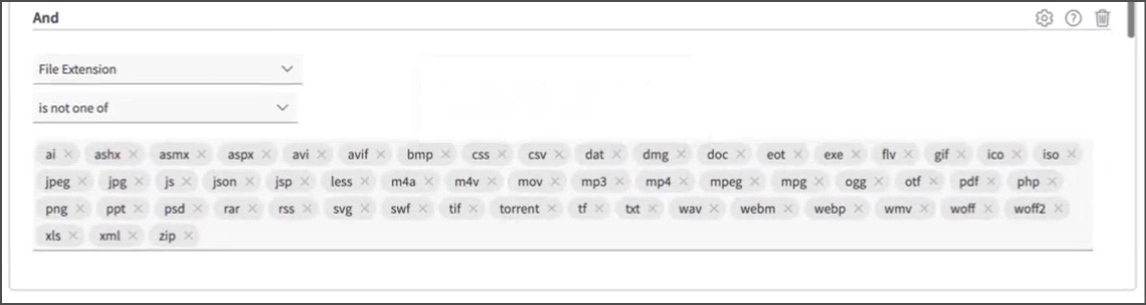
File Extension: Putis-not-one-ofcondition for following file-extensions
ai, ashx, asmx, aspx, avi, avif, bmp, css, csv, dat, dmg, doc, eot, exe, flv, gif, ico, iso, jpeg, jpg, js, json, jsp, less, m4a, m4v, mov, mp3, mp4, mpeg, mpg, ogg, otf, pdf, php, png, ppt, psd, rar, rss, svg, swf, tif, torrent, tf, txt, wav, webm, webp, wmv, woff, woff2, xls, xml, zip
-
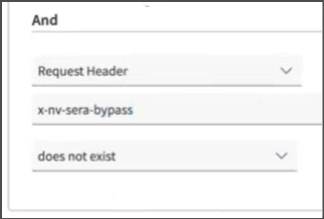
Request Header: Putdoes not existscondition forx-nv-appheader name -
Request Header: Putdoes not existscondition forx-nv-sera-bypassheader name
-
Also add a rule to exclude any requests containing the
nsbpquery parameter in their url
-
-
-
Adding Behavior to the rule
-
Scroll down to
Behaviorssection -
Click on
+ Behavior button

-
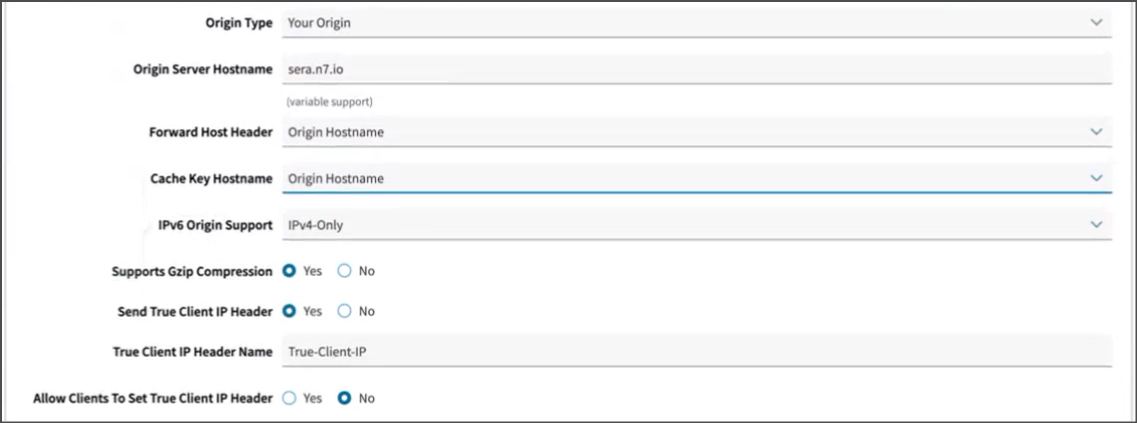
Scroll down to
Origin Serversection, and fill following details :Origin Type:Your originOrigin Server Hostname:SERA_ENDPOINT(Use the one shared by N7 team with you)Forward Host Header: Leave as it isCache Key Hostname: Leave as it isIPV6 Origin Support: Leave as it isSupports Gzip Compression: Leave as it isSend True Client IP Header: Leave as it isTrue Client IP Header Name: Leave as it isAllow clients To Set True Client IP Header: Leave as it is
-
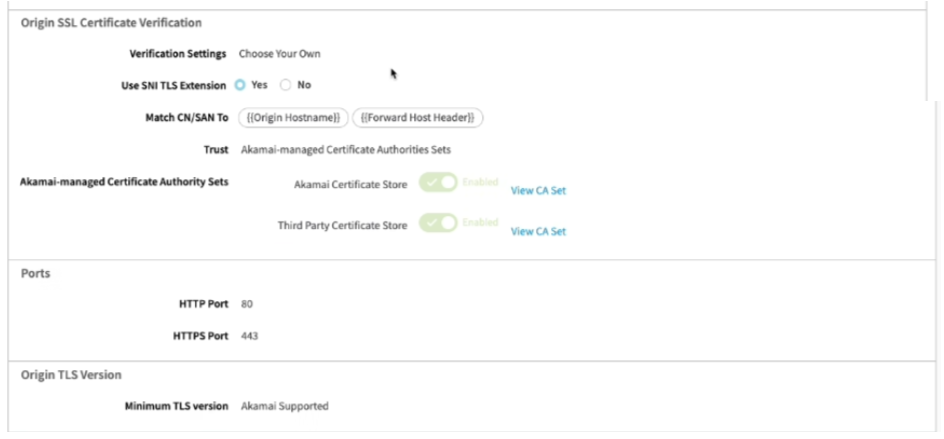
Scroll down to
Origin SSL Certificate Verification,Ports,Origin TLS Versionsections, and fill following details :Origin SSL Certificate Verification:Verification Settings:Choose Your OwnUse SNI TLS Extension:YesMatch CN/SAN To: Leave as it isTrust:Akamai-managed Certificate Authorities SetsAkamai-managed Certificate Authorities Sets: Switch on bothAkamai Certificate StoreandThird Party Certificate Store
Ports:HTTP Port:80HTTPS Port:443
Origin TLS Version:Minimum TLS Version:Akamai Supported
-
Scroll down to
Caching rulesection, andDeleteit :
-
-
Setting up Outgoing request header
-
Scroll back up to
Behaviorssection top -
Click on
Standrd property behavior

-
Select
Modify Outgoing request headerfrom the list, and Click onInsert Behaviorbutton
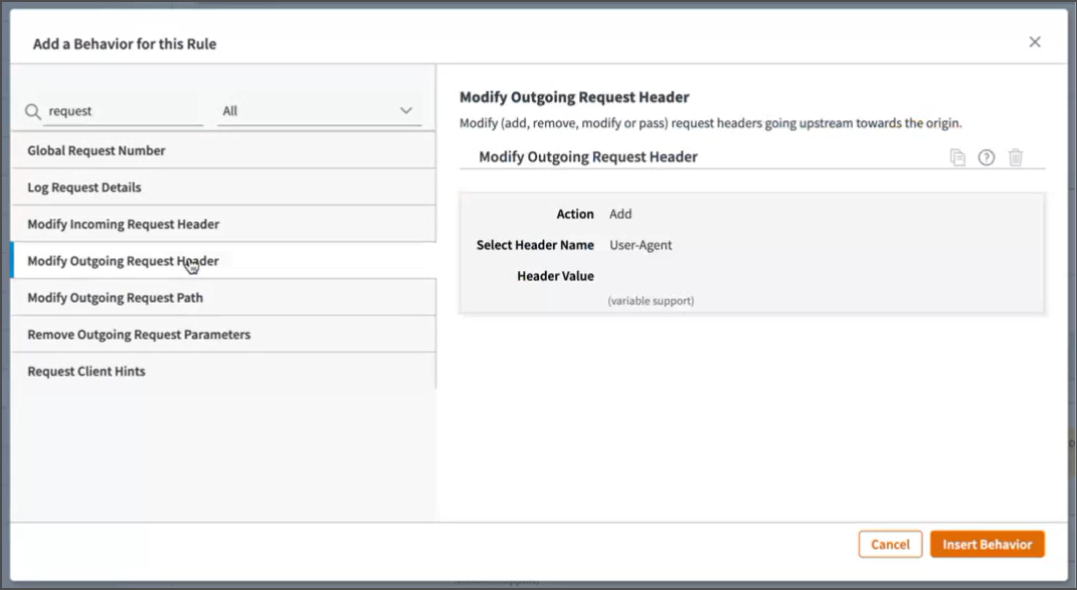
-
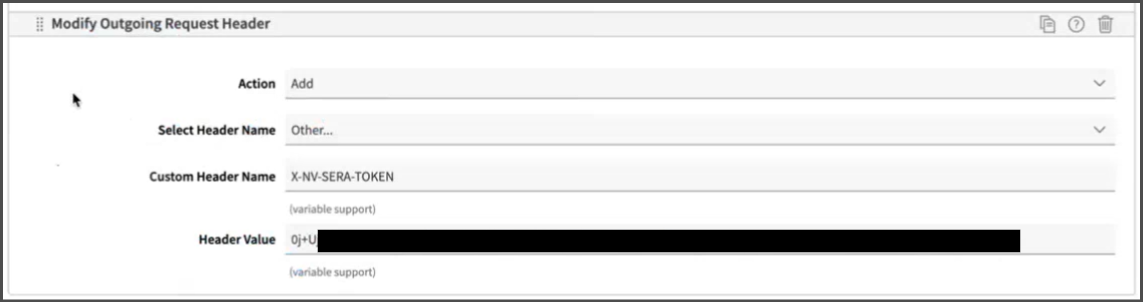
Fill following details :
Action:AddSelect Header Name:OtherCustom Header Name:X-NV-SERA-TOKENHeader Value: The value shared by N7 team with you
-
Add another header
Custom Header Name:X-NV-ACCESS-KEYHeader Value: The value shared by N7 team with you
-
-
Save and Activate
-
Scroll to bottom, click on and
Savebutton

-
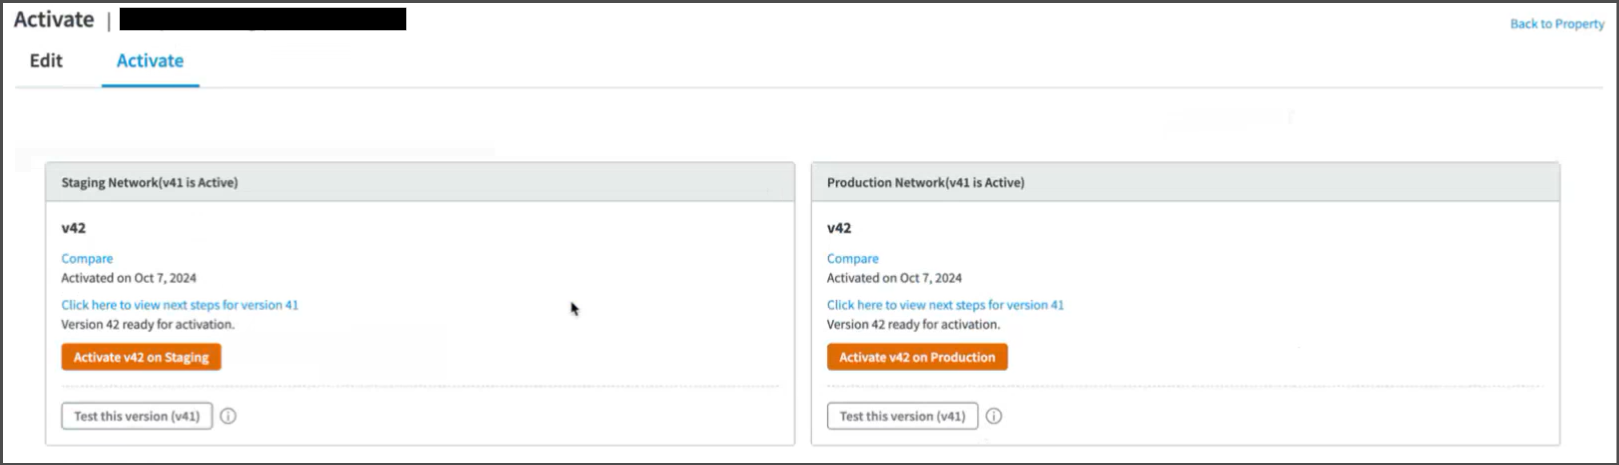
Switch to
Activatetab, andActivateit in the respective environments
-
To verify, access any page matching configured pattern, and with one of the configured user-agents. It should show few response headers starting with
X-SERA
-
-
Testing and Refinement
-
Keep refining the logic by adjusting user-agent list, and SERA exclusion-patterns as needed.
-
Test thoroughly:
-
WPT and GTMetrix will automatically receive the response from SERA due to the routing rule set above.
- Steps to validate page using WPT
-
To check the SERA rendered page on browser, you can use DevTools > Network conditions facility, or some browser extension (like Simple modify headers) to manipulate the browser user-agent. If in testing phase, use these user-agent values: For desktop:
For mobile: If SERA is live, you can use these actual bot user-agent values: For desktop: For mobile:
-
-
Whitelist SERA requests at your origin to avoid any issues with indexing. Details are here
-
On go-live day, set the user-agent condition regex to actual bot user-agent values. Additionally, ensure that your condition is case-insensitive.
-
After go-live, in any dashboards created for monitoring the "actual user traffic" e.g. Google analytics, exclude the requests with user-agent string containing word "Nitrogen SERA" to get correct understanding about user-traffic.